WordPress B2主题订阅号验证码登陆
前言
最近发现可以把B2主题自带的社区登录中的微信登录方式修改为未认证的微信订阅号登录。虽然现在已经有插件可以实现这个功能,但必须打开特定页面才能使用。本教程将介绍如何直接修改主题来实现这个功能
适用说明
- WordPress任意版本 + B2主题
- 需要未认证的微信订阅号
- 预计完成时间:15-20分钟
准备工作
- 下载并安装B2子主题
- 建议使用子主题而不是直接修改父主题
- 避免主题更新导致修改内容丢失
- 确保有以下访问权限:
- 宝塔面板或FTP访问权限
- WordPress后台管理权限
- 微信订阅号管理权限
详细步骤
1. 创建必要文件夹
在B2子主题目录(b2child)下:
b2child/
├── Modules/
│   ├── Templates/
│   │   └── Widgets/
2. 复制必要文件
从父主题复制以下文件到子主题对应位置:
– Modules/VueTemplates.php → 子主题Modules/Templates/
– Modules/Templates/Widgets/User.php → 子主题Modules/Templates/Widgets/
3. 添加基础代码
打开子主题的functions.php文件,添加以下代码:
// 在define( 'B2_CHILD_URI', get_stylesheet_directory_uri() );下面引入
require_once get_stylesheet_directory().'/Modules/Templates/VueTemplates.php';
require_once get_stylesheet_directory() . '/Modules/Templates/Widgets/User.php';
4. 创建微信登录处理文件
在子主题根目录创建wx_login.js文件:
function wxlogin(){
    var wx = document.getElementById("wxlogin")
    var wx1 = document.getElementById("wxlogin1")
    if(wx.style.display == "none"){
        wx.style.display = "block"
        wx1.style.display = "none"
    }else{
        wx.style.display = "none"
        wx1.style.display = "block"
    }
}在functions.php中引入该JS文件:
// 在wp_enqueue_script( 'b2-child-main', B2_CHILD_URI.'/child.js', array('jquery'), B2_VERSION , true );下面引入
wp_enqueue_script( 'b2-child-wx-login', B2_CHILD_URI.'/wx_login.js', array('jquery'), B2_VERSION , true );
找到以下代码:
<div v-if="openOauth">
    <div class="oauth-login-button">
        <a :href="open.url" :class="'login-'+key" v-for="(open,key,index) in oauth" @click="markHistory(key)" v-if="open.open">open.name'.__('登录','b2').'</a>
    </div>
</div>
替换为:
<div v-if="openOauth">
    <div class="oauth-login-button">
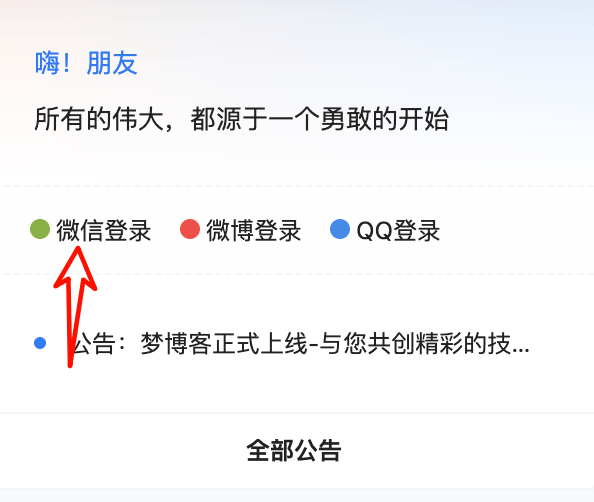
        <a href="https://你的网址/微信登录页面的url" class="login-weixin">微信'.__('登录','b2').'</a>
        // 例如:https://www.qq.com/214
        <a :href="open.url" :class="'login-'+key" v-for="(open,key,index) in oauth" @click="markHistory(key)" v-if="open.open">open.name'.__('登录','b2').'</a>
    </div>
</div>
6. 修改VueTemplates.php文件
- 找到
<div class="login-title">,在其上方添加:
<div id="wxlogin1" class="login-box-in" v-show="!(invitation != 0 && (loginType == 2 && !invitationPass))">- 找到社交登录代码:
<div>' . __('社交登录:', 'b2') . '</div>,替换为:
<div>' . __('社交登录:', 'b2') . '</div>
<div>
    <a class="button222" onclick="wxlogin()" style="cursor:pointer; color: rgb(123, 179, 46);background: rgba(0, 132, 255, 0.05);font-size: 12px;border-radius: 3px;border: 0;display: flex;align-items: center; height: 30px;line-height: 30px; padding: 0 10px;">
        <i class="b2font b2-weixin b2-weixin" style="font-size: 14px; margin-right: 4px;"></i><span>微信</span>
    </a>
    <template v-for="(open,key,index) in oauth">
        <a :href="open.url" :class="'button login-'+key" @click="markHistory(open.mp,$event)" v-if="open.open" :style="'color:'+open.color"><i :class="'b2font b2-'+key+' '+open.icon"></i><span>open.name</span></a>
    </template>
</div>- 添加微信登录弹框。找到:
<div :class="'login-social-button '+(openOauth ? 'show' : '')" v-if="!(invitation != 0 && (loginType == 2 && !invitationPass)) && openOauth">在其上方添加:
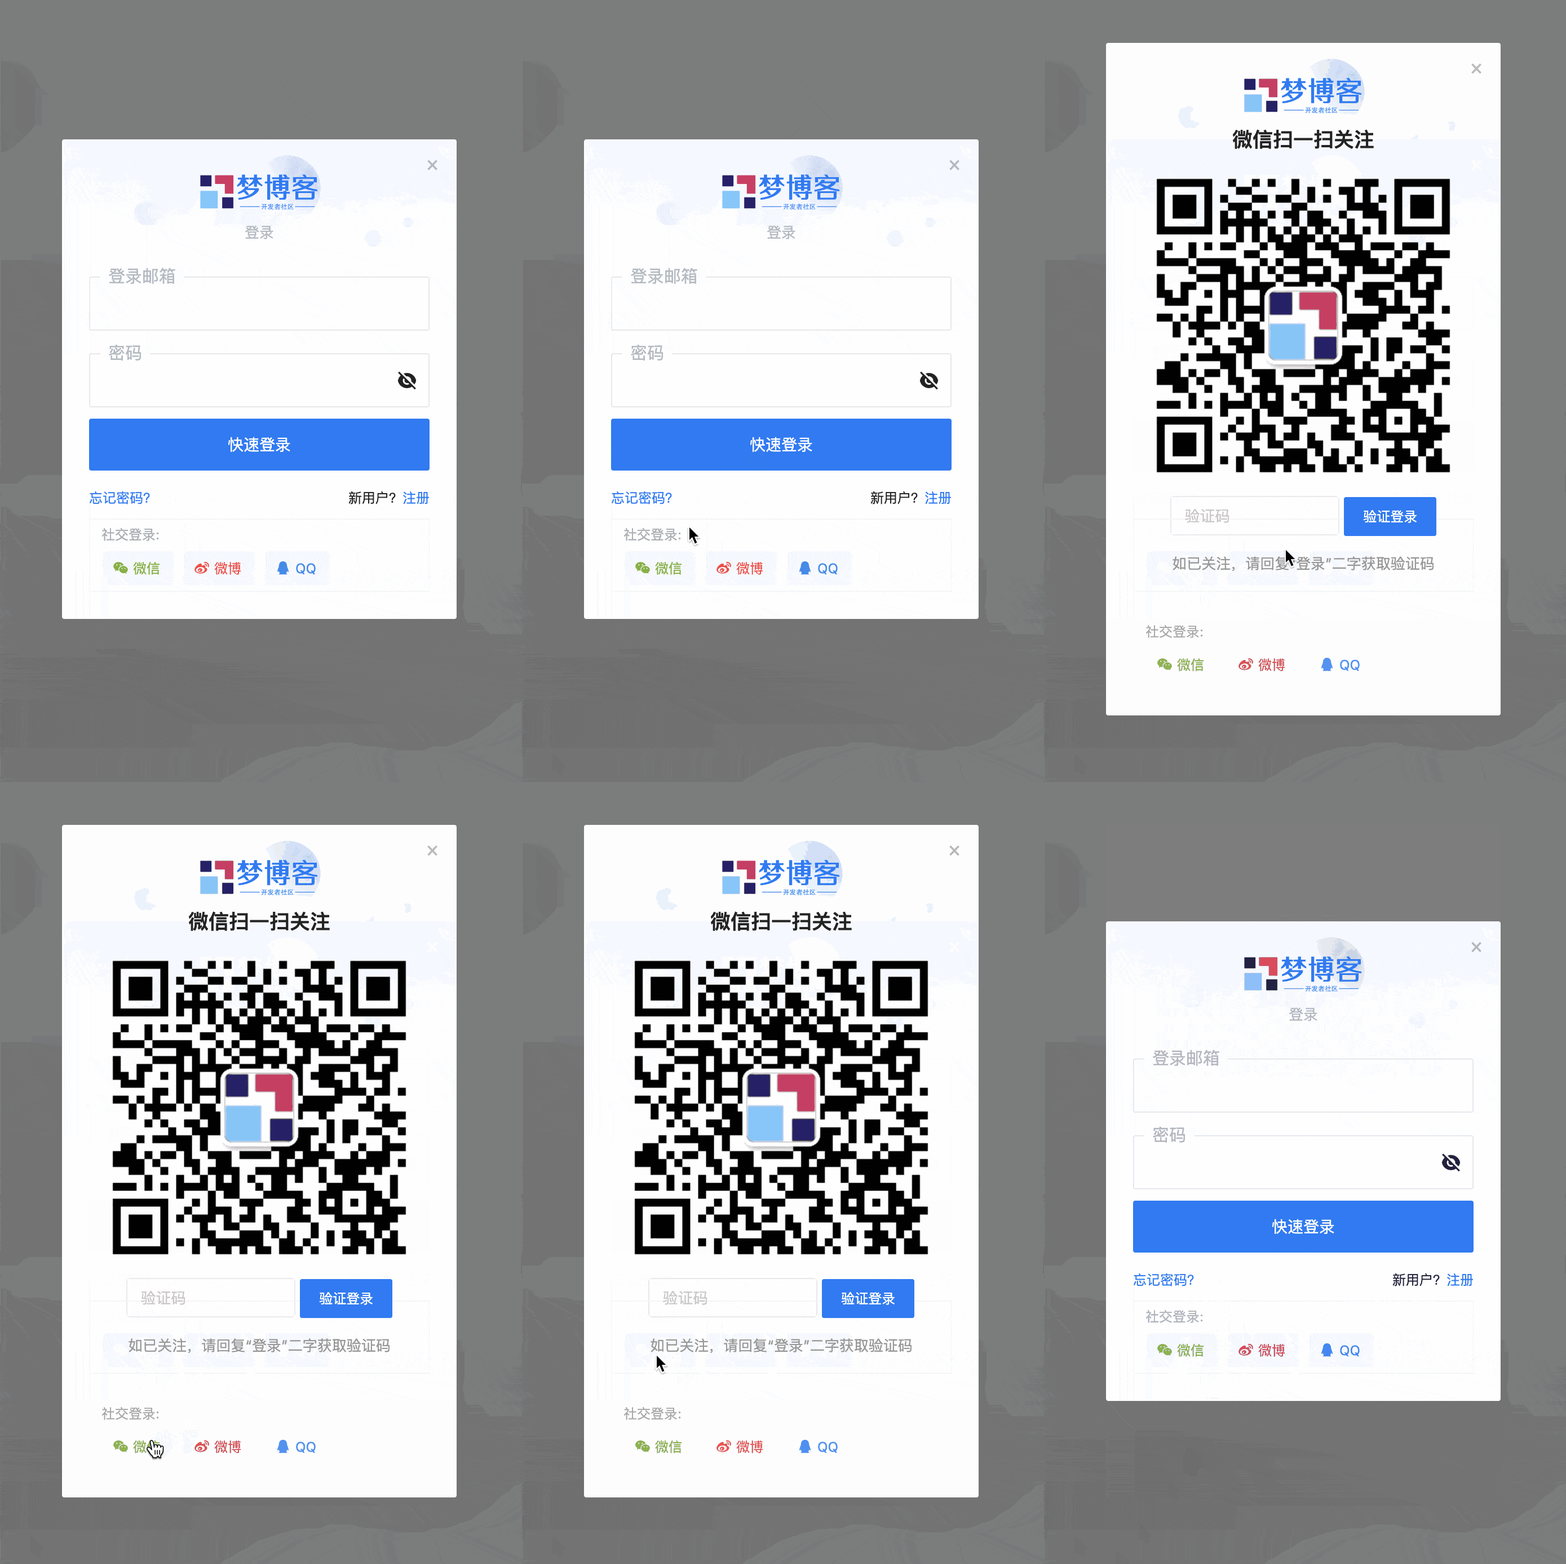
<div id="wxlogin" class="entry-content" style="display:none;margin-top:10px;">
    <style>
        .erphp-weixin-scan{margin:0 auto;position:relative;max-width: 300px;}
        .erphp-weixin-scan .ews-title{text-align:center;font-size:18px;}
        .erphp-weixin-scan img{max-width: 100%;height: auto;}
        .erphp-weixin-scan .ews-box{text-align: center;}
        .erphp-weixin-scan .ews-box .ews-input{border:1px solid #eee;border-radius:3px;padding:6px 12px;width:150px;height: 35px;box-sizing: border-box;}
        .erphp-weixin-scan .ews-box .ews-button{background: #07C160;border:none;padding:7px 12px;color:#fff;border-radius: 3px;font-size:14px;cursor: pointer;height: 35px;box-sizing: border-box;}
        .erphp-weixin-scan .ews-tips{text-align:center;font-size:13px;color:#999;margin-top:10px;}
    </style>
    <div class="erphp-weixin-scan">
        <div class="ews-title" style="text-align:center;font-size:18px;font-weight: 600;">微信扫一扫关注</div>
        <img src="你的公众号二维码图片地址" title="微信登录" alt="微信登录">
        <div class="ews-box" style="text-align: center;margin-bottom:15px">
            <input type="text" id="ews_code" class="ews-input" style="border:1px solid #eee;border-radius:3px;padding:6px 12px;width:150px;height: 35px;box-sizing: border-box;" placeholder="验证码">
            <button type="button" class="ews-button">验证登录</button>
        </div>
        <div class="ews-tips" style="text-align:center;font-size:13px;color:#999;">
            如已关注,请回复"登录"二字获取验证码
        </div>
    </div>
</div>
7. 最终配置
- 进入WordPress后台
- 打开B2主题设置
- 找到”常规设置” → “登录与注册”
- 开启cookie模式
- 保存设置
效果图


注意事项
- 请替换代码中的示例URL为您自己的实际地址
- 更换示例二维码图片为您自己的公众号二维码
- 建议在修改前备份原文件
最后
配置完成后,您的网站将支持未认证的微信订阅号登录功能。如果对您有帮助,欢迎点赞支持!


